I was looking for a breadboard friendly DAC with lots of outputs, and decent resolution.
I found the LTC1660. It can be had for under $10, features 8 outputs, and 10 bit resolution. This should be good enough to control VCOs over a handful of octaves.
There seems to be a single example of how to use it with an arduino, but it doesn't spell out the SPI connections. Without SPI, you're limited to slow, CPU intensive communication. With SPI, I was able to get an example program to output at around 180kHz. This will be much slower in practice, but it shows the potential of the chip.
Below are the connections and code:
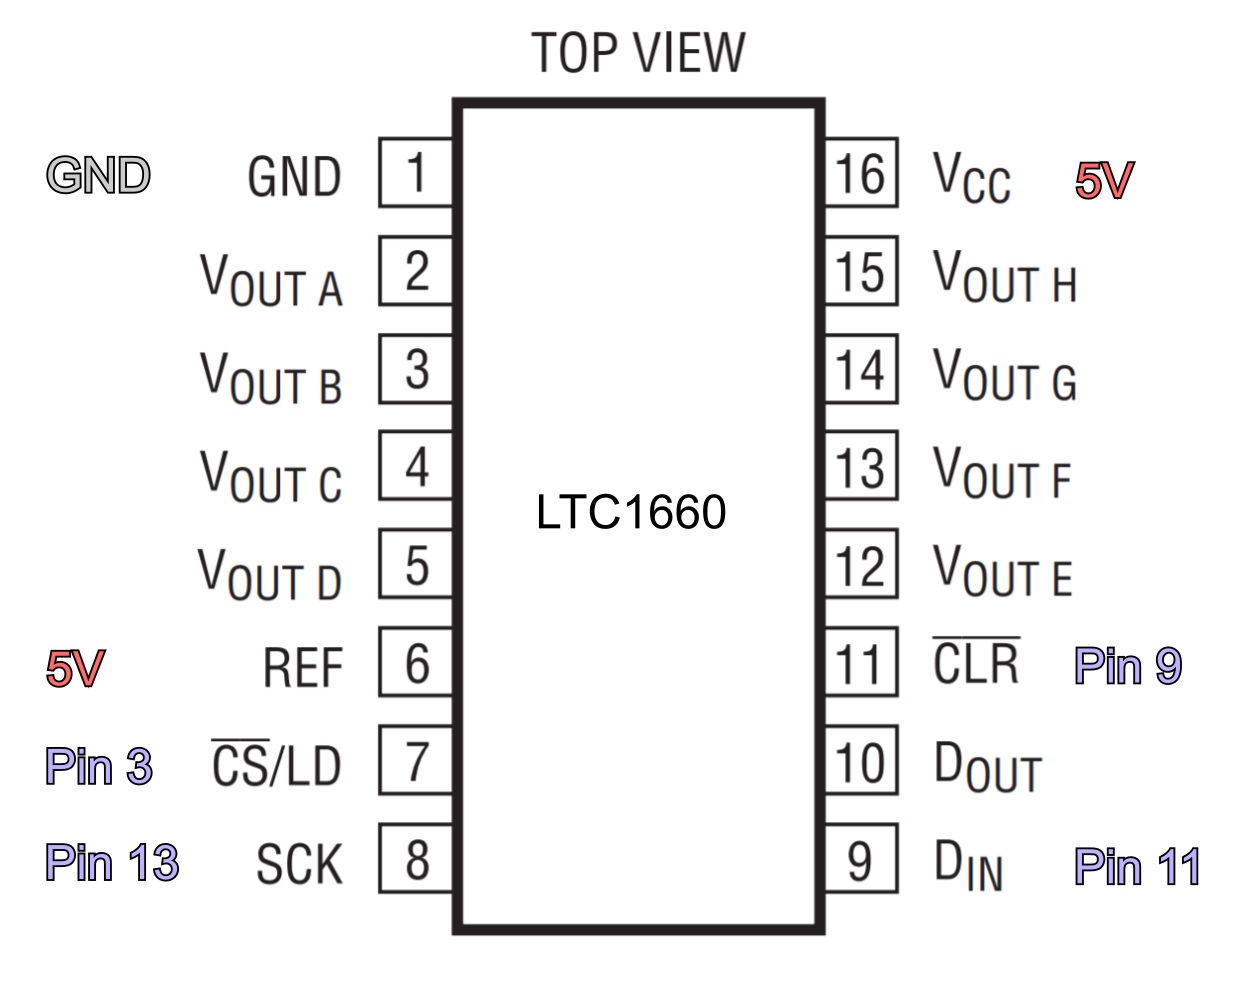
#include <SPI.h>
#include <stdint.h>
const int pinCSLD = 3;
const int pinCLR = 9;

void setup() {
  pinMode(pinCSLD, OUTPUT);
  pinMode(pinCLR, OUTPUT);

  digitalWrite(pinCLR, HIGH);
  digitalWrite(pinCSLD, HIGH);
  SPI.begin();
  SPI.setClockDivider(SPI_CLOCK_DIV2);
}

void loop(){
  for (int i = 0; i < 1024; i++) setDAC(1, i);
}

void setDAC(uint16_t address, uint16_t value) {
    uint16_t h = address << 4 | value >> 6;
    uint16_t l = value << 2;
    PORTD &= ~(1 << pinCSLD); //LOW
    SPI.transfer(h);
    SPI.transfer(l);
    PORTD |= (1 << pinCSLD); //HIGH
}


